Here is a very dirty way to export the patch from Wysiwyg into an ETC EOS Console with the help of Microsoft Excel.
It might need a little polishing, so let me know if this works on your set-up and find a way to improve or streamline this a bit more.
There are a few steps you need to do, so only do this with large shows, where it would be a lot of work to type everything twice.
You need:
- Wysiwyg
- Microsoft Excel (with macro's activated)
- ETC EOS offline or online version 2.7 or higher
Step 1:
Patch your show as you would usually do
Step 2:
- In DATA view make a new Columns Shortcut
- Open View Options>Data Options
- Add ONLY the following Columns in this order:
Channel, Spot, Type, Purpose, Color, Patch Universe, Patch Address
If you plan to do this more often you can put it in your wysiwyg template (.wyt)
Please see the attached Wysiwyg to EOS.wyg file for an example.
Step 3:
- Select this sheet
- Choose File>Export>Worksheet
- Make sure you choose the .xls file format
- Make sure you check the "Use standard English headers" checkbox
Step 4:
- Open the exported file in Excel
[Only first time]
If you plan to use this macro more often, save this macro to your PERSONAL macro's so you can use it from every excel file you open.
- Run the Macro
- Save the file as a new file with the Fileformat "Text with MS-DOS format"
A text file gets saved as if it were saved as an export from Lightwright to EOS.
Step 5:
- Open a new show in EOS
- From the Filebrowser in the CIA choose Import from Lightwright
- Select the txt file that you just created in Excel
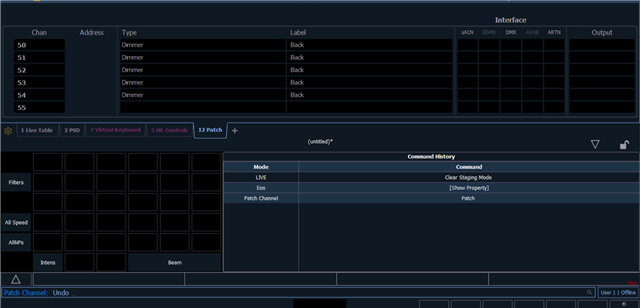
- Make sure the right columns are imported (see screenshot)

- Make sure you associate the Fixture types from Wysiwyg into Fixture types from the EOS library by clicking [MAP DEVICES] (see screenshot)

- Choose [DONE] when you did this for every fixture (this is persistent for future imports, including fixture mode)
- Now click OK to import the file
Sub ExporttoEOS()
' Export_to_EOS Macro
' Export wysiwyg output from Datasheet "Lightwright Export" to ETC EOS console import from Lightwright

' Inserts a column for Channel to merge Spot and Channel
' numbers into
' Renames column headers
' Adds a formula to translate patch universes and
' patch addresses to absolute DMX addresses
' Change formula's to values

Dim sht As Worksheet
Dim LastRow As Long

Set sht = ActiveSheet

Columns("A").Insert

Range("A1").Value = "Channel"
Range("B1").Value = "Conventional"
Range("D1").Value = "Instrument Type"
Range("I1").Value = "Formula"
Range("J1").Value = "Dimmer"

LastRow = sht.Cells.Find("*", searchorder:=xlByRows, searchdirection:=xlPrevious).Row
Range("A2:A" & LastRow).Formula = "=B2&C2"
Range("I2:I" & LastRow).Formula = "=(G2-1)*512"
Range("J2:J" & LastRow).Formula = "=SUM(H2+I2)"

Dim rng As Range

    For Each rng In ActiveSheet.UsedRange

        If rng.HasFormula Then

            rng.Formula = rng.Value

        End If

    Next rng

End Sub